Create a contact
Create a contact with identity, classification, tags, contact details, and a primary address.
Key guidance
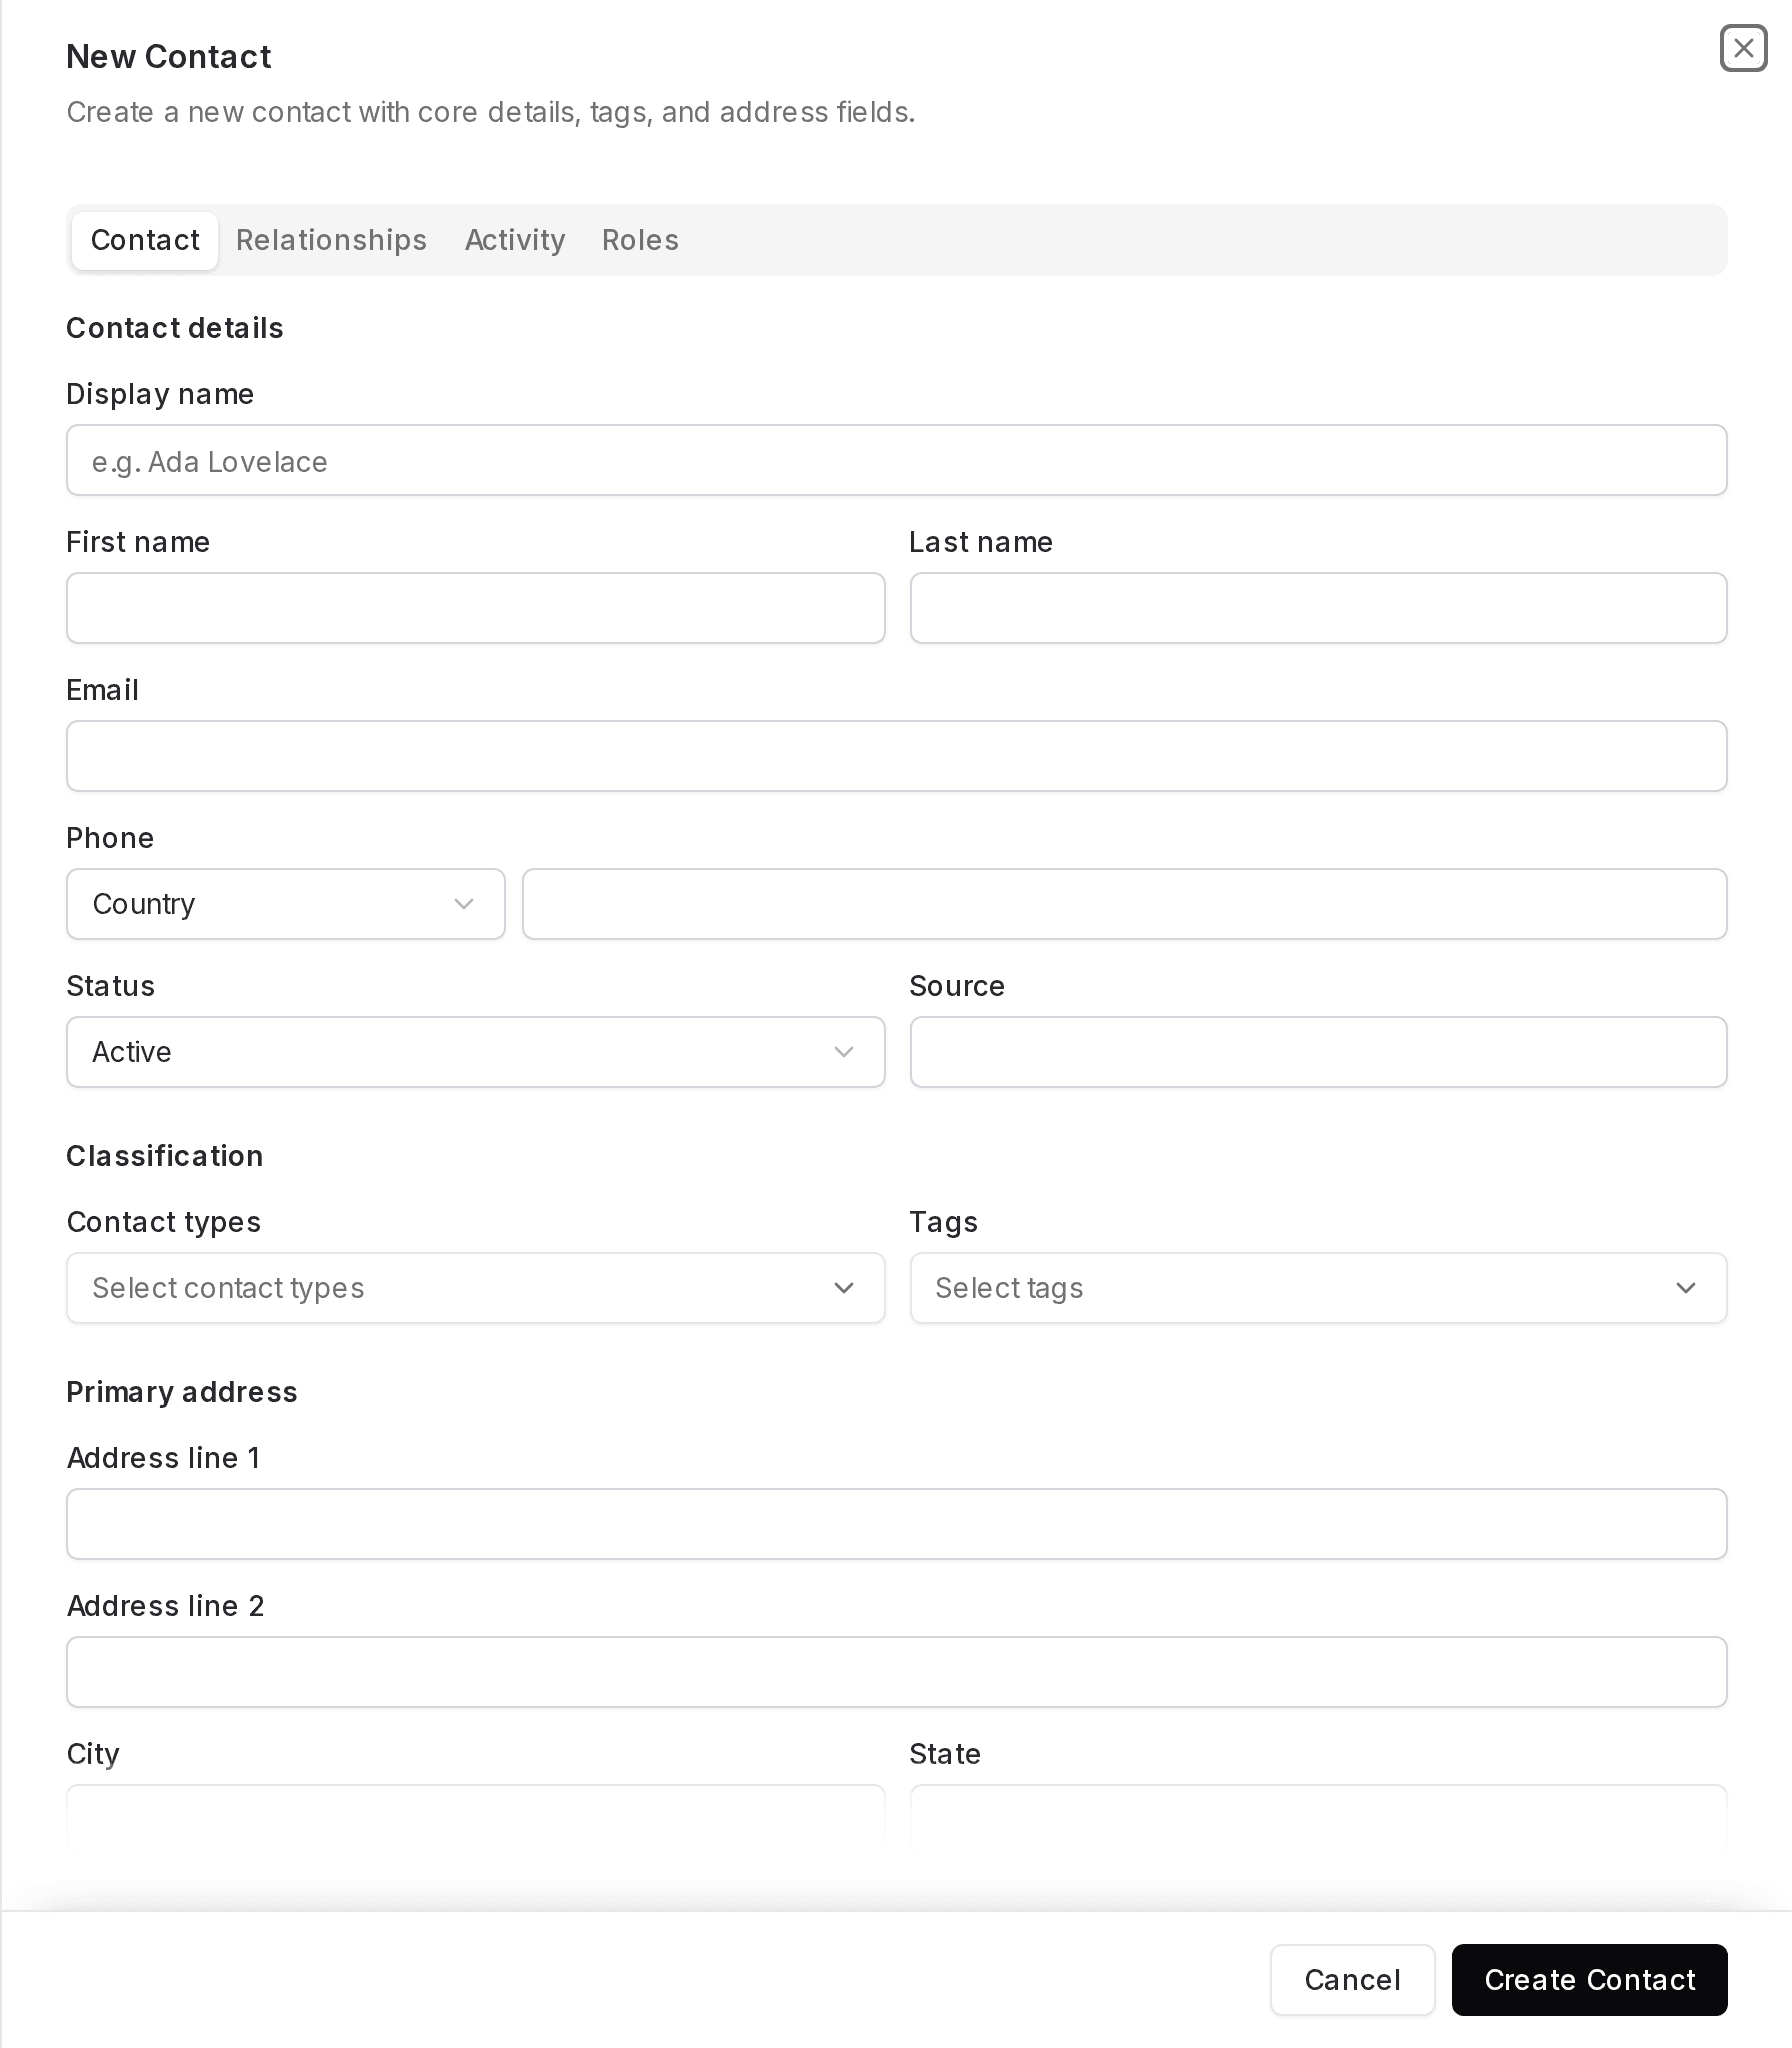
No fields in the New Contact modal are shown with required markers.
Classification is provided by Contact types and Tags fields (use the 'Select contact types' and 'Select tags' controls).
Phone includes a Country selector paired with the phone input.
Status is a dropdown control and is shown with 'Active' selected in the modal.
Display name shows the input placeholder 'e.g. Ada Lovelace'.
The Relationships, Activity, and Roles tabs are available.
Procedure
-
Open the New Contact modal
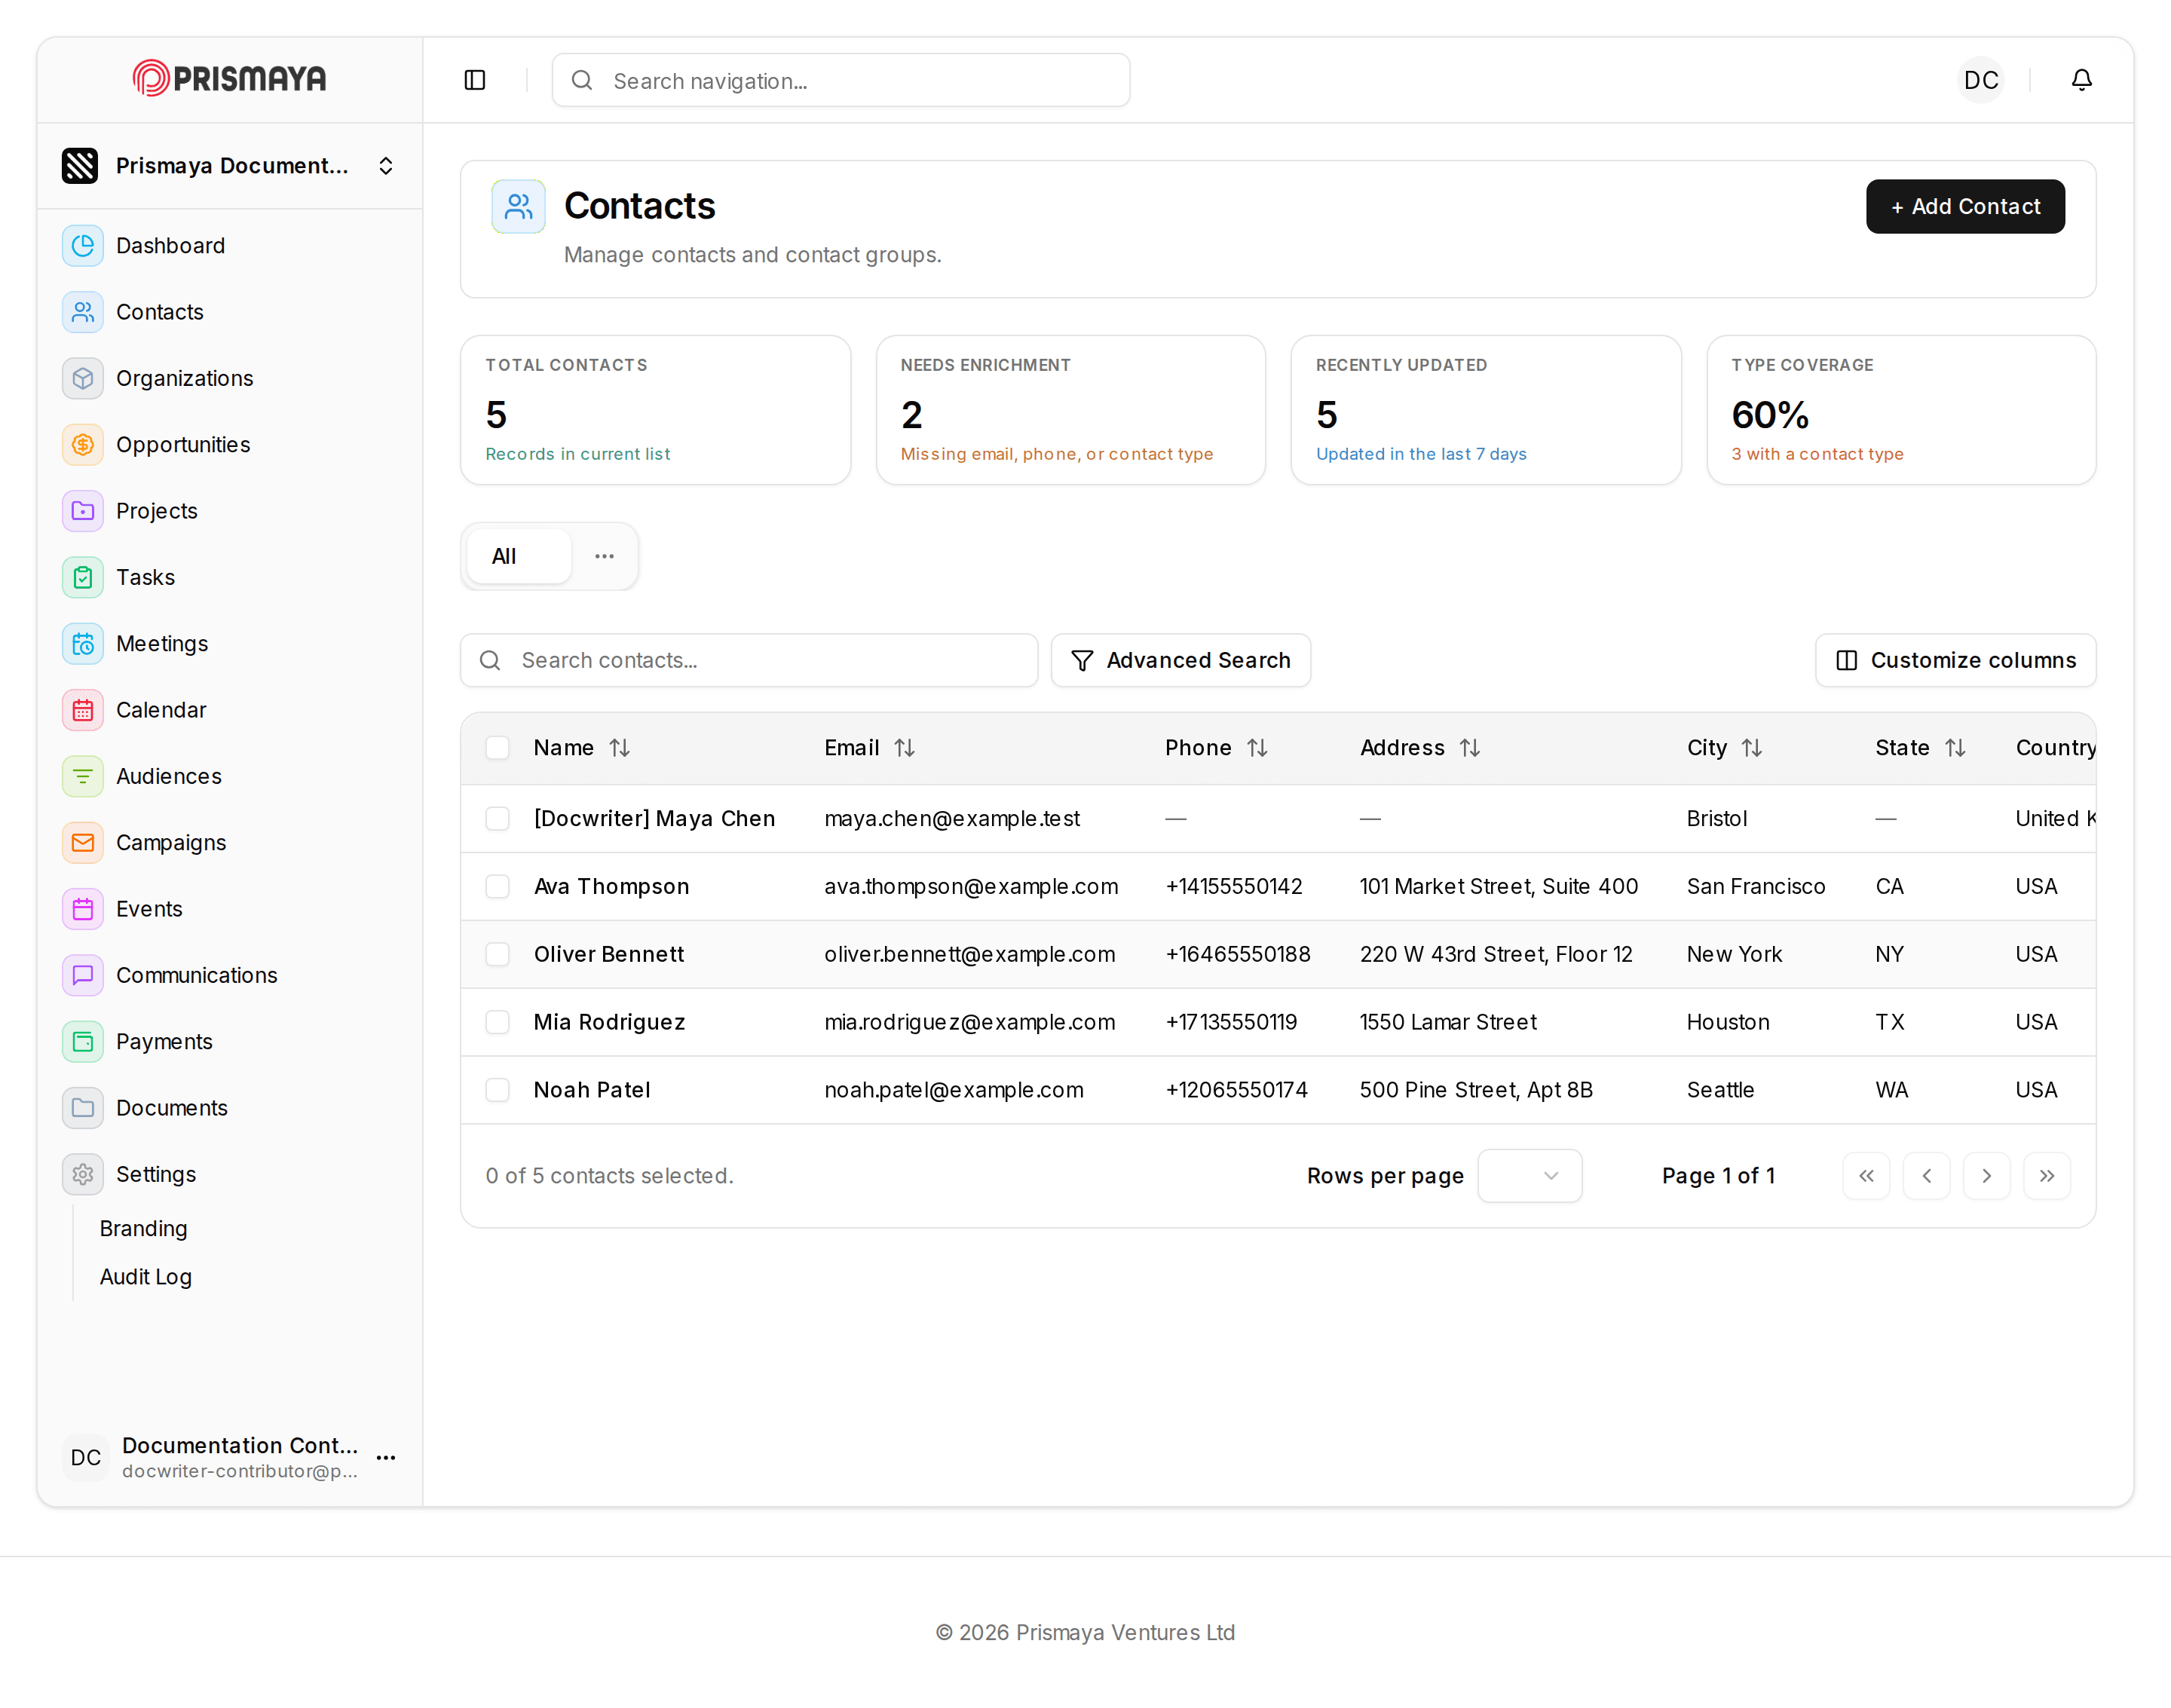
From the Contacts page, click + Add Contact to open the New Contact modal.
- The New Contact modal appears with the Contact tab active and the subtitle 'Create a new contact with core details, tags, and address fields.'
-
Enter contact fields in the Contact tab
In the Contact tab of the New Contact modal, enter values into the fields and make selections where applicable.
- Display name: text input with placeholder 'e.g. Ada Lovelace'.
- First name / Last name: text inputs for personal name parts.
- Email: email input field.
- Phone: a Country selector dropdown is paired with the phone number input; choose the country then enter the number in the adjacent input.
- Status: a dropdown control (the modal shows 'Active' selected).
- Source: free-text input.
- Classification: select Contact types using the 'Select contact types' control and select Tags using the 'Select tags' control.
- Primary address: Address line 1, Address line 2, City, and State are text inputs for the primary address.
- Fields in this form: Display name, First name, Last name, Email, Phone, Status, Source, Contact types, Tags, Address line 1, Address line 2, City and State.
-
Finish or cancel
When you have entered the contact information, use the modal actions at the bottom to finish.
- Click Create Contact to attempt to create the contact.
- Click Cancel to close the modal without creating the contact.